
Once upon a time, ride-sharing with Uber might have seemed like a bandwagon that only latte-sipping hipsters and avocado-loving Millennials jumped on. But as more and more people realised it’s actually an affordable, reliable and safe alternative to traditional taxis, ride-sharing took off, and now it’s Australia’s most popular private transport service.
There are a few ride-sharing companies in the Aussie market but Uber’s been leading the charge in safety and quality since it launched in Australia in 2012. That’s why it’s the country’s most popular ride-sharing service provider.
More than 4.7 million people used it in 2019 and it’s easy to see why; it’s safe, reliable, convenient and generally cheaper than taking a taxi, and Uber has a rigorous process for ensuring its drivers offer customers a good experience.
If you haven’t already used Uber, your kids or grandkids have probably encouraged you to give it a whirl – and we’ve got all the info you need to get started.
All you need is a smartphone and data or a wi-fi connection to use Uber. (You can use Uber with a desktop computer too, but that’s less common and not as convenient when you’re on the go.)
Simply download the Uber app from the App Store if you’re an Apple user or Google Play if you’re Android. Once you’ve downloaded the Uber app to your smartphone, fill out your details as per the next step.

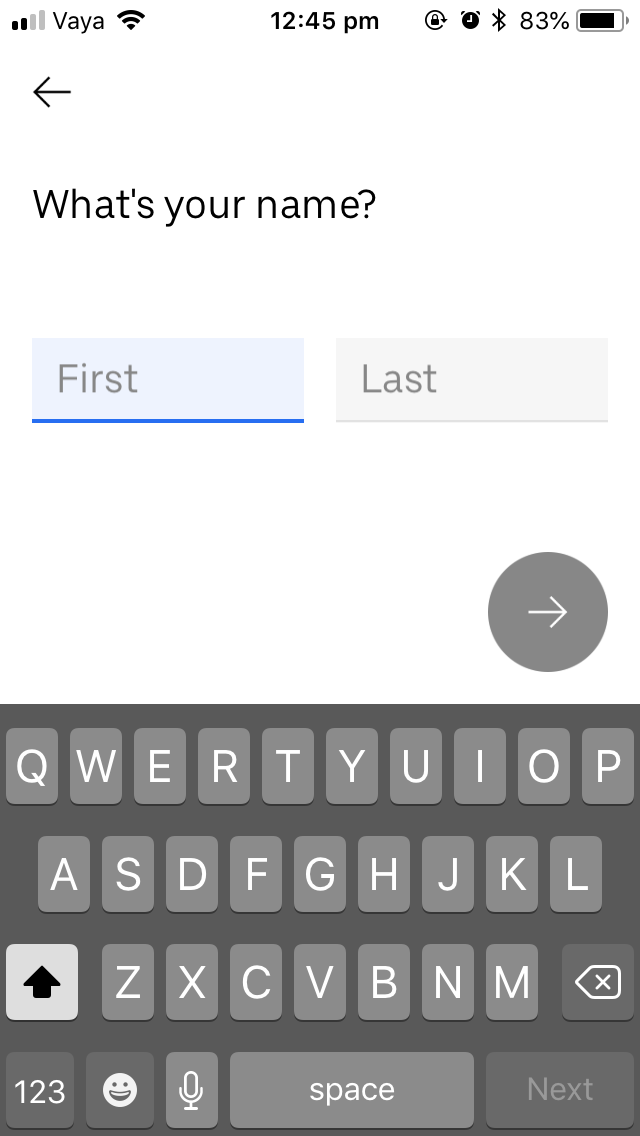
When you open the app, you’ll be prompted to fill in your first and last name, phone number and preferred language. Next, you’ll be sent a text message in order to verify your phone number and you’ll also be asked to create a password and agree to terms and conditions and a privacy notice.
From here, you’ll be required to enter your payment information. The credit or debit card you enter will be automatically charged after each ride – no cash ever changes hands with an Uber driver.

If you’ve claimed your promo code for your first free Uber ride, here’s how you can get the $20 credit attributed to your account.
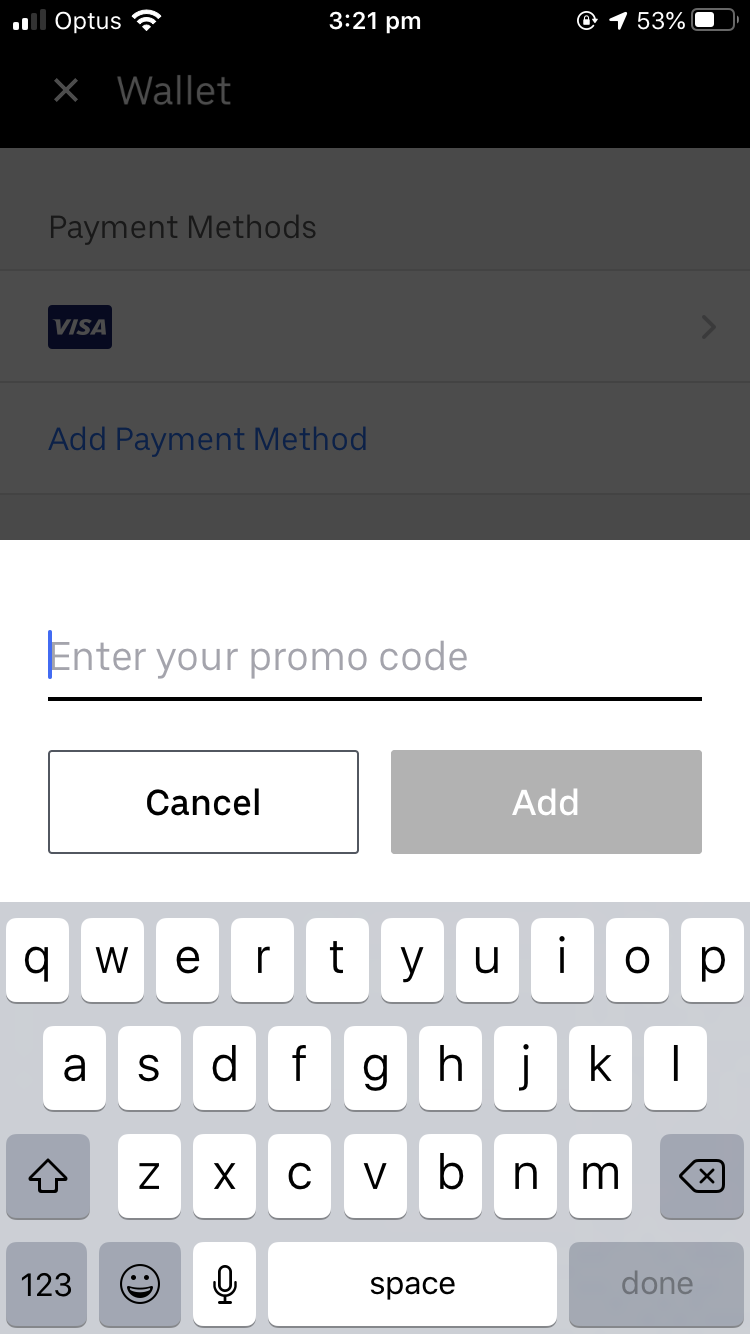
Tap on your picture in the top left corner of the app. This will open up a menu. Select the ‘Wallet’ option.

You should now see an ‘Add promo code’ option in the menu. Select this.

This should open a pop up, where you can type in the promo code you received via email and select ‘Add’. You should see a $20 credit in your account after this.
Now that you’ve got your app all set up, it’s time to ride! Open the app and enter where you want to go in the ‘Where to?’ box. Tap to confirm your pick-up location (you’ll be able to check whether it’s where you actually are by looking on the map) and tap ‘Confirm’ again to be matched to a driver nearby.
You’ll be able to see how many drivers are in your area, and how many minutes away they are from your location.

Uber offers several types of vehicles available to accommodate different group sizes, service needs and budgets, so there’s something to suit every circumstance.

Once you’ve entered your desired destination and chosen the type of vehicle you want, you’ll be matched with a driver, whose full name, vehicle information and photograph will be shared with you, as well as their current location.
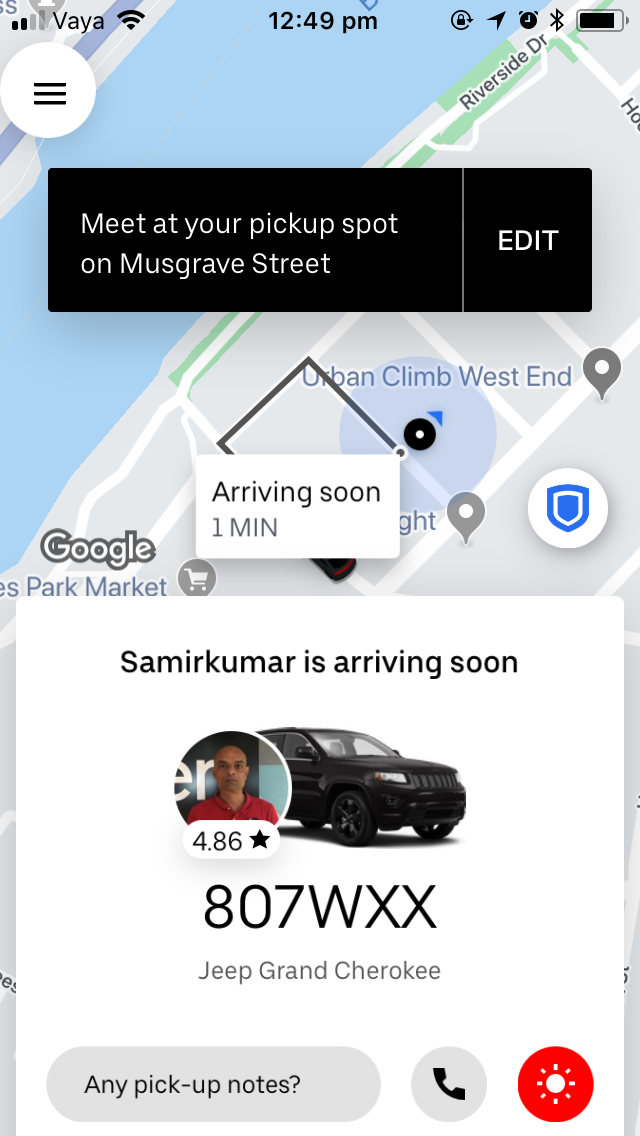
Once you’ve been matched, you’ll be able to track your driver’s progress on the map on your app so see how far away they are and how quickly they’re progressing in your direction. You’ll also receive a notification to let you know when they are two minutes away, and another again when they arrive. That’s right – no more standing around on the kerb in the hot sun or the pouring rain for ages, wondering when your driver will turn up!

Every time you take an Uber ride, check the licence plate, make and model of the car to make sure you are getting into the right car. (If you’re in a busy location, other people may have also ordered Uber pick-ups on the same street – it wouldn’t be the first time someone got into the wrong Uber by mistake!)
This information will be provided for you in the app so you’ll know which vehicle you’re keeping an eye out for, and the car should also have a big Uber sticker displayed on its front or rear windscreens, which will make it easier to spot.
Once you’ve greeted your driver, sit back and relax! Uber has strict guidelines for the types of cars that drivers can use, so you’ll find them to be clean and modern. Many drivers add to the experience by offering water, sweets or mints; most are happy to have music on or off or change radio station if you ask, and will adjust the air-conditioning for your comfort.
Uber’s upfront pricing model simplifies the whole process. Before you request a ride, the app will provide you with an estimated fare, meaning there’s no need to stress as a meter ticks away.
Even when Uber fares rise during busy times – which is known by ride-sharing companies as surge pricing – you’ll be given an upfront fare so you know how much you will be charged ahead of time. You can also use the price estimator on Uber’s website to get an idea of the cost of a ride well ahead of booking it.
After you reach your destination, there’s no hassle finding change or using your card to pay – everything is taken care of through the app.
Once you reach your destination, you’ll be prompted by the Uber app to rate your ride. Five stars will appear on your screen and you can choose how many to rate your driver, based on your experience. The driver will also rate you as a rider.
There is also an option to provide a tip for the driver, if you had an excellent experience with them.
You might still have questions about how Uber works in every circumstance, though, and you’ll certainly find the answer with its detailed guide to using Uber.
If you are keen to try Uber for the first time, you’ve got great timing! For a limited time only, Uber is offering 60-pluses a free first ride. Find out how to redeem your free ride.


![]()
 Proudly Australian owned and operated