8 ways to repurpose your old jeans
Do you have some old jeans laying around that you no longer wear or want? Don’t let them collect dust or throw them in the bin – there are some great ways to repurpose jeans you may not have realised!
Here’s 8 that we love – which will you give a go?
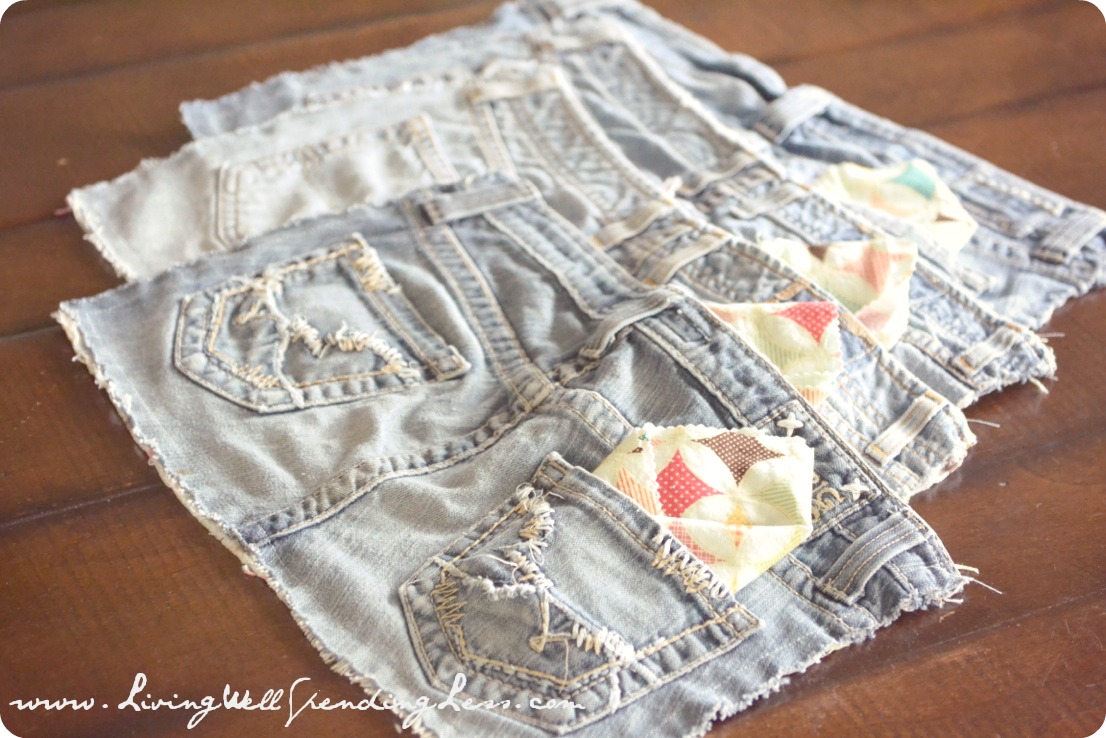
1. Denim placemats

You will need:
- old jeans
- pre-washed fabric
- sewing machine,
- straight pins
- scissors
How to:
- Cut the bottom out of your jeans in a rectangle shape. Try and make the edges straight and the corners square, although you don’t need to be pedantic about this.
- Place the fabric face down and then place the denim rectangle on top. Pin in place and cut fabric around the denim.
- Stitch around each edge of your placemat, leaving 1.5cm margin.
- Wash and dry in a washing machine and dryer to fray the edges.
- Even out the fray by trimming any stray threads.
Extra step: If you wanted to make matching placemats cut cloth napkin-sized from the extra fabric. Fold into triangles and tuck into the back pocket of the denim. You could also use the pocket for cutlery.
2. Flower beret

You will need:
- denim fabric
- something to trace to make a circle
- pencil
- scissors
- a hair clip
- glue gun
- buttons or other decorations.
How to:
- Each flower needs 5 circles, trace them out.
- Pinch the circle to make a quarter circle.
- Using the hot glue gun, stick the ‘petal’ to the base circle. Do so for each petal.
- Glue the button or other decoration to the centre of the flower.
- Now glue the back of the flower to the hair clip.
3. Bulletin board

via Crafts n Coffee
You will need:
- Styrofoam sheet (3 x 30 x 90 cm)
- Old jeans
- 50cm quilt batting
- Woven ribbon, 35cm, 2.3m
- Embellishments of your choice: Buttons, brads, pins, charms, ribbons, etc.
- Craft glue
- Low-temp glue gun and glue sticks
- Tools: Scissors; ruler; sharp pencil; serrated knife and bar of soap OR dental floss; straight pins
How to:
- Measure and mark a 30cm x 60cm rectangle on foam sheet. Wax serrated knife with soap and cut along the marked lines.
- Cut a 35cm x 66cm piece of batting. You may need to cut two layers if your batting is thin. Place the foam sheet in centre of batting. wrap the batting to the sides and glue in place. Trim excess batting if you need to.
- Cut off one leg from jeans and carefully cut open along the inner seam; fabric should lay flat when open. If your jeans have a curve and fabric puckers and does not lay flat, cut the leg into two sections, closely following the inner seam. Trim away excess fabric along cut edge of the seam. Glue the two leg sections back together, layering the seam on top.
- Place denim fabric face down on table. Centre foam sheet with the batting face down on the denim. Fold denim fabric around board and onto the back side, starting on one long edge and pin fabric in place. Repeat with other long edge.
- Flip board over to be sure fabric is straight; adjust if needed. Glue in place.
- Repeat with two short sides, folding and pinning corners so they are neat and straight. Glue fabric to back of bulletin board. Trim away excess fabric.
- Cut four, 56cm lengths of ribbon. Arrange ribbons in a criss-cross, diamond pattern on front of board. Pin and glue ribbon ends to back; pin and glue ribbons where they cross in front.
- Cut 15cm length of ribbon; pin and glue to back of pin board for hanging.
- Cut out the pockets from the jeans and trim excess fabric from edges. Glue the pockets to the front of the pin board.
- Decorate as you wish.
4. Rug/bathmat

via All Free Crafts
You will need:
- a large piece of thick denim
- chalk or a dressmakers pencil
- lots of thin denim
- sewing machine
How to:
- For the backing, cut a piece of heavy-duty denim fabric to whatever size you like. Finish the edges off using bias tape.
- Mark the backing fabric with a chalk or a dressmakers pencil. Starting at the outside edge, draw lines 3cm apart.
- Cut out large amounts of 5cm x 8cm rectangles out of thin denim.
- Begin sewing the rectangles to the backing fabric, starting in the centre. Sew straight through the middle of the rectangle width, so both sides stick up evenly, gathering the fabric either before you stick the fabric under the presser foot, or bunching it up as you sew.
- When you have completed one line, or gone around one marked rectangle, sew it down again to secure it.
- Lastly, cut the rectangles in half along the length, to make rectangles that are 4 cm x 5cm and sew along the edge of the backing fabric, so that the last row lies flat.
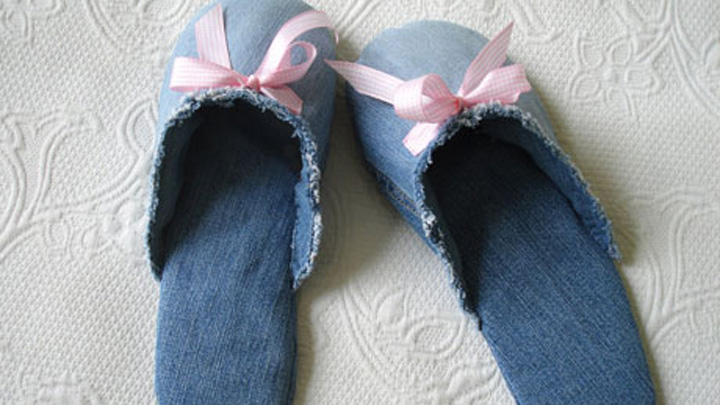
5. Slippers

via The Guardian
This one’s a little bit tricky so take a look at these great instructions.
6. Apron

What you’ll need:
- one pair of jeans
- fabric of your choice (around a metre)
- sewing machine
- iron
How to:
- Fold the fabric in half long ways and cut along fold. Fold in half again and cut again. You should have 3-5 long strips.
- Iron the edges up 1cm.
- We are going to fold that in half and iron it again. Finish all your strips and set aside
- Cut off a leg right underneath the pocket then cut out the back pocket entirely, getting as close to the seam edge as possible.
- Turn the leg over so the front is down and cut right up the back in a straight line.
- Put the right sides together and cut out a crescent shape.
- It doesn’t matter what side is up. If it’s a skinny jean the bottom would be the top, and if it has a big flare the bottom will be the bottom.
- If you are making it for yourself, hold it up and see if it is right.
- Pin your fabric all the way around, leaving 1cm of fabric on both sides of the bottom.
- Once it’s pinned make sure it fits over your head.
- Sew the fabric on the top of the pocket first, then pin the pocket on.
- Cut off all your loose strings and done!
7. Mason jars

What you’ll need:
- stretch denim jeans
- mason jars
- hot glue gun
How to:
- Cut out the pocket and stretch over a mason jar.
- Use hot glue to glue down the seams on the side as well as the bottom.
- Done!
8. Pouches

via MakeZine
What you’ll need:
- One pair of jeans, any adult size
- 45cm lining fabric
- 90cm trimming
- Heavy-duty sewing machine needle for denim
- Fabric marking tool
- Ruler
- Fabric shears
- Scissors
How to:
- Begin with a pair of legs from a pair of unwanted jeans.
- Cut along the inseam of each leg piece to open them up flat.
- Place a straight edge across the bottom of the flat leg piece, perpendicular to the seam running up the centre. Mark a line just above the hem. Cut on the line to remove the hem and even out the bottom edge of the leg piece. Repeat for the second piece.
- Using the seam as your centre point, measure and mark 20cm across the top on either side of centre. Next, at the bottom edge, mark 18cm centre.
- Next, using a ruler and marking tool, draw a line from the top mark to the bottom mark on each side to create a trapezoid shape (bigger at bottom than top). Cut on the lines.
- Using your denim pieces as a template, cut out 2 side pieces of lining fabric and 2 pieces of batting
- For the bottom, cut a 22cm diameter circle out of lining fabric, batting, and leftover denim. You can make a circle template by tracing a plate or using a compass. If necessary, you can seam 2 smaller scraps together to create the denim circle, as I have done.
- Place your lining pouch pieces right sides together, then layer the batting pieces onto the wrong sides of the lining. (The lining should be sandwiched between the batting.) Pin the angled sides together. Place the denim bin pieces right sides together and pin along the angled sides. Sew the lining/batting side seams and the denim side seams, each using a 0.5cm seam allowance. Press seam allowances open. Layer batting onto the wrong side of the lining piece. Fold right sides together and sew seam.)
- Fold the sewn lining/batting pieces in half, aligning one side seam on top of the other. Mark the folds with a pin. Layer the bin bottom batting onto the wrong side of the bin bottom lining. Fold in half and mark with pins. Refold, aligning pins and marking the fold again.
- Using the pins as an alignment guide, pin the lining/batting bottom to the sewn lining/batting pieces (this is the smaller end of the bin). Align the marking pins with the side seams and the pins placed at the folds. Continue to pin around the perimeter, evenly distributing the fabric. Sew around the perimeter with a 0.5cm seam allowance. Trim seam allowances to 2mm. Repeat this step for the denim sides and bottom.
- Pin the trim of your choice around the perimeter of the top opening of the denim pouch, then sew 2mm from the edge.
- Sew all the pieces together then roll down the top edge of the pouch to make a cuff!
Do you have any other uses for denim to add?
Explore More
Book Confidently With Us


Pay safely with us


![]()
 Proudly Australian owned and operated