8 awesome ways to reincarnate your old crockery

Kitchen objects always seem to be able to turn a house into a home. Bringing us together over a meal is definitely not all these objects are capable of though! If you have too many china items or pots and pans and are looking for new ways to decorate your home, we might just have the answer. From blackboards to photo frames to fairy lights these ideas have definitely got us inspired…
1. Beautiful teacup pendant lights
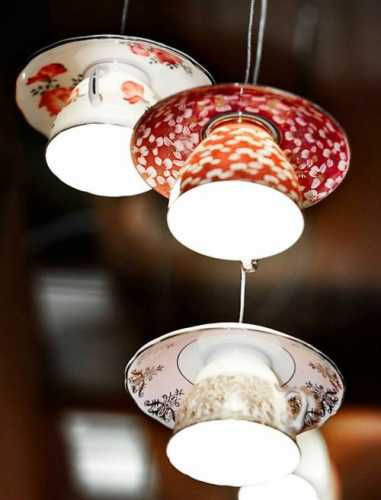
via Shelterness
- Prepare for drilling – fill a container with enough water to cover your tea cup and saucers.
- Carefully drill holes – drill a hole large enough to feed a pendant light cord through using a diamond drill bit. Make sure you do this underwater otherwise china gets too hot and cracks
- Thread pendant light cord – Unscrew the decorative cover on the light cord. Thread cord through the holes in your cup and saucer. Rescue the cover tightly.
- Screw light bulb of your choice into the pendant light cord fitting. Hang your teacup and saucer lights.
Alternative you can use fairy lights!
2. Blackboard tray

- Tape all around the edge of the tray. Then wrap the handles and upper edges in plastic bags and tape down – this will prevent any paint getting on the edges.
- Paint with blackboard paint. You will need to do two or three coats and allow it to dry between each.
- Allow it to sit outside for ventilation.
- Peel off the tape and you have a little blackboard!
3. Pie tray photo frame
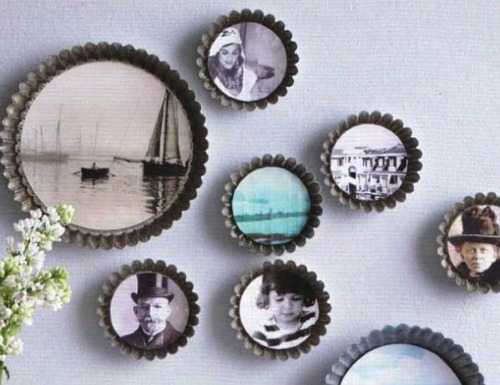
You will need a pie tin, printed photos, spray adhesive and a plate hanger.
- Place your pie tin on a piece of paper and trace around the base with a pencil, drawing a circle. Cut out the circle and place it inside the pie tin to make sure it is a perfect fit. If it isn’t then just trim the paper.
- Use your paper circle as a template to cut your photo to a perfect fit.
- Spray the back of your photo with spray adhesive. Lay it right side up in your pie tin and use a soft cloth to gently press your photo into place. Iron out any wrinkles as you go.
- And you’re done!
4. Teacup fairy lights
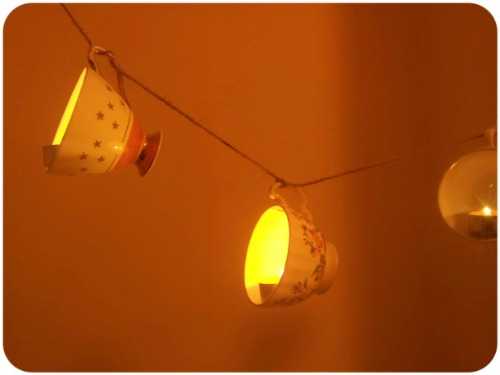
via Recycle Nation
- Thread tea cups onto string and knot around the handle to secure the cup.
- Once the string of teacups has been hung up, place tea-lights (battery powered is a safer option) in each cup.
- Viola! Beautiful little fairy lights.
5. Teacup pincushion
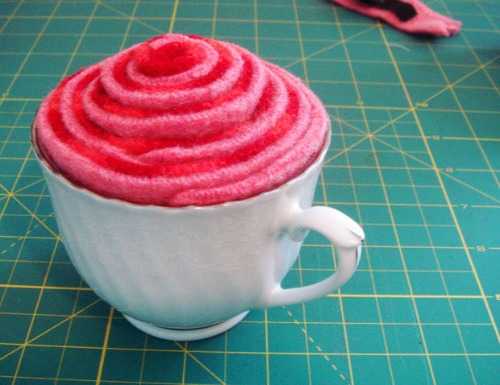
via Iheartnaptime
- Place stuffing into cup and compact it tightly
- Remove stuffing from cup and roll into a ball. Cover with stuffing with a piece of felt.
- Cover with material of your choice and secure the base with a rubber band.
- Put a ring of glue around the inside of the teacup (about an inch lower than the rim).
- Place the fabric ball into the teacup and secure. You can then clue a saucer to the teacup if you wish.
6. Homemade three-tiered tray
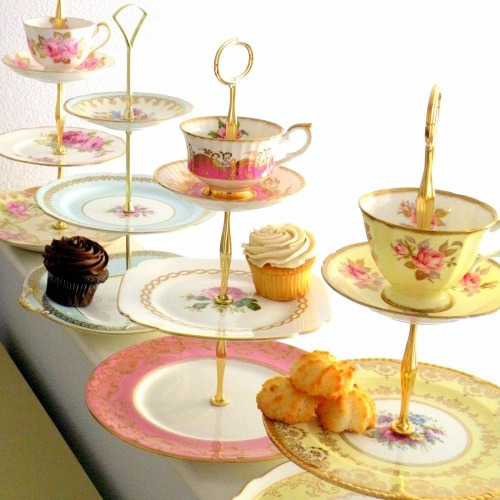
via Konadlicious
- Select three plates you wish to use, make sure they are in graduated sizes.
- Purchase a stand kit.
- Fill a container large enough to cover your plates with some water. Place the plates in the container and drill a hole in the centre of each plate. Make sure to use a drill bit that is the same size as your stand screws. Diamond drill bits often work best.
- From your stand kit, attach the bolt underneath the plate along with the metal O ring. Put the plastic O rings between the plates and the stands to protect the plates from the metal.
- If you want to place a teacup on the top of your three tiered stand than you will again need to drill a hole in the centre and secure it with a plastic O ring. This is completely optional though.
7. Teacup candles
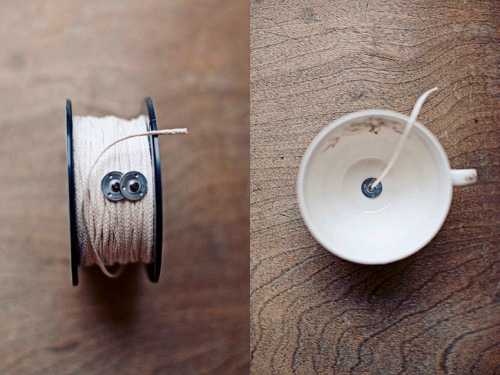
via Elizabeth Anne
- To make this cute little candle you will need wicks and a stabiliser. Use a small about of hot glue to adhere the wick to the bottom of the teacup.
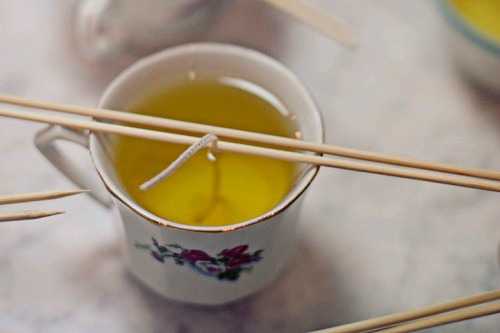
- Melt the wax and add any scent you like.
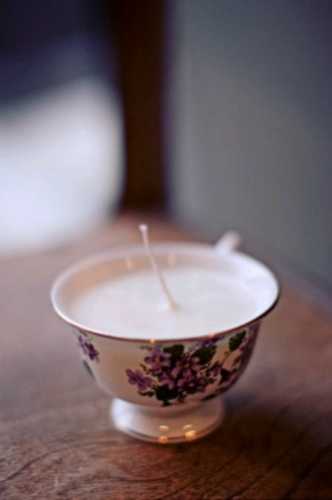
- Use barbecue skewers to hold the wick in place while you carefully pour the melted wax into the teacup, as seen above. (Be sure to leave about half an inch at the top of the cup)
- Leave the teacup on a flat surface to dry. Once dry you have a beautiful candle!
8. Miniature garden from any old kitchen objects


via Pinterest and Kinarino Japan
- Put about a tablespoon of fine gravel on the bottom of your chosen kitchen item.
- Place some potting mix in your “pot”, leave enough space for your plant.
- Plant your plant in the pot and fill around the edges with more potting mix.
- Sprinkle some more fine gravel over the surface of the potting mix. Then water carefully.
Note: If you can, drill a drainage hole in the bottom of your kitchen item. This is not necessary if you use gravel but could help your plant grow.
Do you have any other nifty ideas you would like to share?
Explore More
Book Confidently With Us


Pay safely with us


![]()
 Proudly Australian owned and operated