6 clever and easy DIY garden projects

There’s plenty of room for growth in your garden! Check out these 6 clever ways to make your garden your own. Even if you don’t have space for a garden but want to try a little gardening project, these ideas will be perfect for you. Plus, you probably have most of these tools lying around the house just waiting to be put to use.
You’ll have a beautiful and creative backyard to enjoy before you know it. Take a look at the 6 garden projects below.
1. Transform an old tire into a garden stool

Items needed
- 1 old tire
- Wooden board
- Cushion
- Jigsaw
- Acrylic paint
- White gloves
- Sandpaper
- Rope
- Brush, pencil and tape measure
Steps
- Measure the diameter of the tire
- Draw the circle on the wooden board. Use a rope to create a compass shape to trace – move the outside of the radius along the entire board to create the circle
- Cut the board with the jigsaw and sand sides until smooth. Paint it on both sides. Once dry it will be the cover of the tire!
- Now paint the tire. Apply primer to seal the surface and to prevent it from cracking. Then choose your preferred colour to paint the outside.
- Place cushion over wood board.
Via DIY Enthusiasts
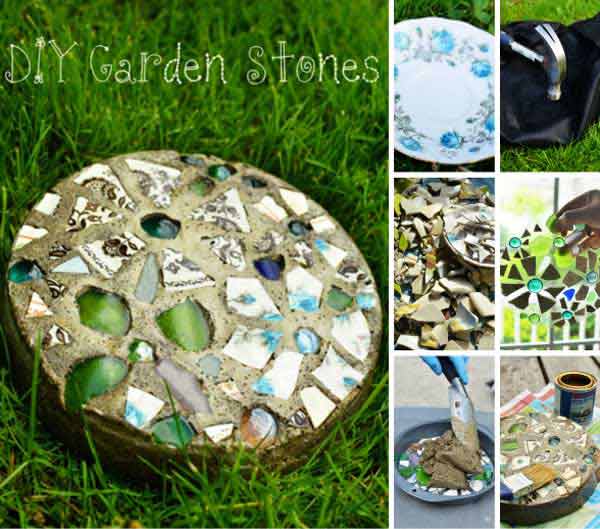
2. Create colourful and handmade garden stones
Items needed
- Round non-stick cake pan or whatever shape you like
- Vaseline
- Contact paper
- Old plates or saucers
- Glass gems
- Concrete
- Marine varnish
- Chicken wire or other type of wire mesh
- Safety glasses
- Rubber gloves
- Hammer
- Bucket
- Towel
- Water
Steps
- Put safety glasses on, place plates in a cloth bag and smash with hammer. Repeat until you have all the pieces you need. It’s good to have a variety of sizes
- Place cake pan on contact paper and trace around it. Then cut around the paper circle to place inside pan sticky side up.
- Add mosaic pieces to the contact paper with whatever design you like! Make sure each piece is firmly place down on contact paper. Also, ensure there is enough space between the pieces so that the cement can fill the spaces in between.
- You can life the contact paper and view your design too.
- Mix your concrete (follow instructions on bag).
- Cut a square piece of chicken wire or mesh to fit inside stepping stone – this will help support it.
- Line inside of cake pan with Vaseline for easy removal.
- Spoon concrete into cake pan and evenly cover – with your gloves.
- Place mesh wire onto the wet concrete and then spread another layer of concrete over wire.
- Let sit for 2 days. Then turn it over and tap the back of pan, it should easily release. And finally slowly remove the contact paper.
3. Vertical pallet garden
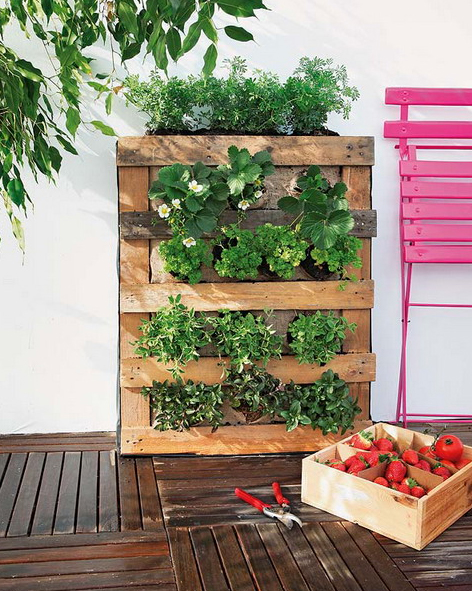
Items needed
- 1 wooden pallet
- Burlap
- Sturdy garden film
- Scissors
- Furniture stapler
- Universal soil
- Plant seeds or young seedlings
Steps
- Attach the burlap to the inside of the pallet
- Wrap the back of the pallet with garden film and secure it with a furniture stapler. Staple 3 sides (except the top) by burning the corners.
- Fill the entire volume with soil.
- Then make small cuts with scissors in the burlap and place the seeds. Make sure the keep the ballet in a horizontal position until the germination is guaranteed.
- Flip vertical when you see the plants have settled down. It’s great for herbs and low-growing flowers. Plus you can move the pallet anywhere you’d like!

- Potting mix
- Whatever old instruments you choose
- Selection of plants
5. Tipsy pots planter
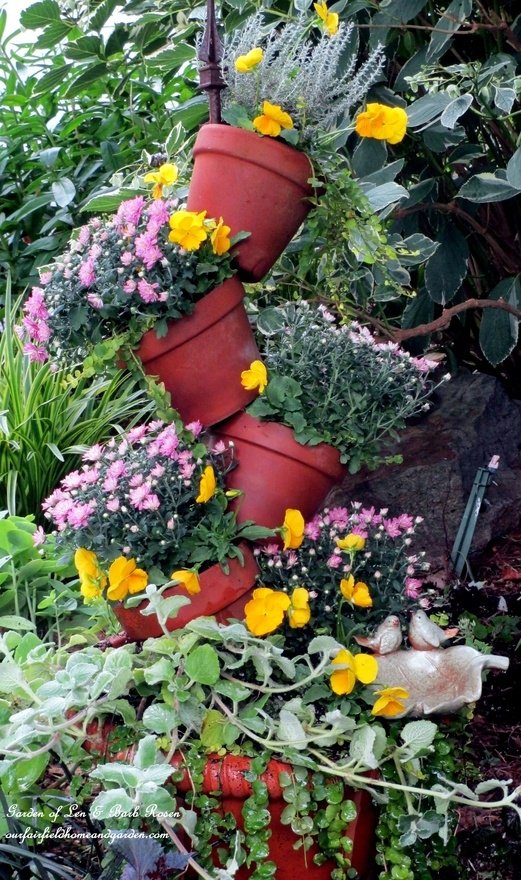
Items
- Four clay pots and one large clay pot for bottom
- 2 bricks
- Finial (bought or homemade)
- 120cm piece of rebar
- Moisture cooling potting mix so you don’t have to water too often
- Selection of plants
Steps
- Insert rebar into pot and down through drain hole to ground for stability
- Upend the bricks and sink into the soil on both sides of rebar. Place edge of the first pot on one.
- Stack pots on rebar (tilt in opposite directions so it rests on pot below). Continue stacking.
- Now you are ready to plant!


Items needed
- Wire
- Colander
- Marbles
- Crystals or beads
- Adhesive
- Pliers to twist the wire
- Scissors
- Choking gun
- Electric drill
Steps
- Wrap wires around marbles. Make sure you have extra wire to attach them to the colander.
- Attach glass gems/flat marbles to colander
- Determine how much you want to suspend the colander – use a piece of wire.
- Voila! You’re garden bling is ready!
Via Empress of Dirt
Have you tried any DIY garden projects recently? What do you think of these ideas? Tell us below.
Explore More
Book Confidently With Us


Pay safely with us


![]()
 Proudly Australian owned and operated